Pages

Thursday, July 29, 2010

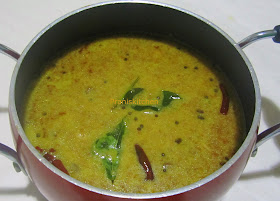
Erisseri-Pumpkin and Red beans in Coconut Paste

“Erisseri”, The name itself is really interesting, right?. It is a special Kerala dish, made with Red bean and Pumpkin (or Yam) in coconut paste. The main ingredient for any type of erisseri is the Red bean(van payar).About the red bean-this bean is known as  azuki bean .They have a uniform red color, but white, black, gray and variously mottled varieties are also known.You can even use black-bean or white bean. But red-bean gives more color and taste to the dish.Here i am using the red bean only(see the Picture)
Erisseri always reminds me about the Kerala feast,One of the must see dish in kerala sadhya..I used to prepare the same whenever I get a chance to buy pumpkin. When I found the pumkin in Jungle Jims( i have talked a lot about this store in my previous posts) during my last week shopping, I thought of making this kerala delicacy. So i thought today i can share with you guys this   Erisseri(With Pumpkin) Recipe.(there are two kinds of erisseri one with Pumpkin(today's Special) and other one with Yam and Plantain).Sure will post the Yam Erisseri soon
One of the important step in this recipe is that we have to add the fried coconut while seasoning, this increase the aroma and taste of the dish.My mil used to say without dried coconut we can’t call it as erisseri .You have to use the nicely grated coconut otherwise it spoil the entire taste  of the erisseri (amma used to say the same)
One thing i like to mention (anyway Onam is in our door steps with in days)is that if you are trying to make a Kerala feast, you will come to know that in almost all the dishes (Aviyal, Thoran, Erisseri and Pulisseri), we are using a mixture of coconut and cumin seed. Some dishes need some extra ingredients such as pearl onion/chili or pepper. So prepare a large amount of coconut-cumin seed mixture and use it for all these dishes. Those dishes which need additional ingredient, just add those additionals.That way u can save a lot of ur valuable time.
OK, Let me share the Kerala special erisseri..
Ingredients
Pumpkin: small portion(as seen in picture)
Red bean: 1 cup
Green Chili: 2 nos
Turmeric Powder: 1/2 tsp
Salt : to taste

For grinding
Coconut: 1/2 cup
Cumin seed: 1 tsp
Pearl Onion: 1 no
Water : as required


For seasoning
Coconut: 3 tbsp
Oil: 2 tbsp
Mustard seed : 1 tsp
Red chili: 2 no
Curry leaves: 1 sprig


Preparation
  • Soak the red beans/perumpayar overnight.
  • Cut the pumpkin into medium sized pieces
  • Slit the green chili
  • Make a very  nice paste of coconut ,cumin seed ,pearl onion.Add some water and salt  while grinding
Procedure
  • In  a pressure cooker cook the red beans with salt and turmeric powder until the beans are completely cooked.
  • Add the Green chili and pumpkin pieces to the cooked beans and then cook the same for one whistle..
  • Mash the cooked beans and pumpkin,then add the coconut mixture.Mix well and cook the same for 3- 5 minutes in medium heat..
  • Heat oil in another pan.Add the mustard seed once it started spluttering add the red chili and curry leaves and some grated coconut and fry until the coconut get nice brown color..
  • Add the seasoning to the cooked pumpkin beans mixture.Heat for 1 minute..
The delicious Erisseri is ready to have.. Have it with rice and some stir fry.

Cook’s Tip
  • Soak the beans overnight otherwise it won’t get completely cooked.
  • Make a very nice paste of coocnut and cumin. if u like u can add the green chili with that.
  • If u want to make more gravy add more water while cooking the beans.Usually the erisseri is in semi gravy form. 

    Monday, July 26, 2010

    Pavakka Kichadi/Bittergourd in Yogurt

    When I shared the  Pachadi recipe, I mentioned that there were some confusion about these Pachadi and Kichadi dishes. Both dishes are served in kerala feast.Whenever I prepared the pachadi, I always ask myself that is this kichadi? or pachadi?.. Somehow my hus given some solution( answer ) for this confused question. If you are using Mustard seed and Grated Coconut in the mixture, it is called as Pachadi, if not, it will be "Kichadi". Pachadi is usually preparing with Pumpkin, Plantain (Ethakaya) and Pineapple etc (Some of them use mango & grapes as well). You can use any veggie/ fruit of your choice but those I mentioned above are the commonly used one. Pachadi is prepared with the blend of coconut, jeera, Mustard and yogurt. For kichadi recipe we are not using the mustard as a main ingredient with the mix(as mentioned above). But some part of kerela this variation is also  known as Pachadi.
    Today i am going to share with you the the Pavakka(Karela) Kichadi(Bitter-gourd in Yogurt ). Anyway do not confuse about the name. Usually we use Okra and beetroot for this kichadi preparation. There is not need to write more abt the nutritional factor of this great veggitable, right? However, frankly speaking I don't like this vegetable because of its bitterness but my hus is a die-hard fan of this veggie, love  to have any dish with this vegetable. So this one is a must buy item in my shopping list and also i used to make the theeyal, stir fry (mezhukku puratti)and this kichadi. If you are a "pavakka-hater" like me just try this dish, fried pavakka won’t have that much bitterness as the fresh one and you can also enjoy eating this kichadi. Sometimes we have to have such hatred dishes for healthy benefits. Whenever I avoid this vegetable my father used to say if you are not having this dish now,  you would need to drink its juice in future (Its juice is good medicine to lower Diabetes) . Nowadays my hus used to say the same. I am really scared of this diabetics so really having this bitter healthy pavakka.Anyway this kichadi is really a delicious and healthy one..Best combo with Rice and Thoran.
    Ingredients
    Bitter gourd/Bitter Melon: 1 no
    Oil: for frying
    Green chili: 1 no
    Curd: 1/2 cup
    Water: for diluting the curd
    Turmeric Powder: 1/2 tsp
    Salt: to taste
    For seasoning
    Oil: 1 tsp
    Mustard seed: 1/2 tsp

    Red Chili: 2 no
    Curry leaves: 1 sprig
    Preparation
    • Cut the bitter gourd into thin round shaped pieces.Chop the green chilies
    • Marinate the bitter-gourd pieces and green chili with salt and turmeric powder
    • Dilute the curd by adding enough water
    Procedure
    • Heat oil in a pan.Deep fry the bitter-gourd pieces.Transfer the fried bitter gourd pieces into kitchen tissue(u can avoid excess oil in it)
    • Add the fried pieces into the curd and mix well.Add salt as required.
    • Heat oil in a pan..Add mustard seed ,once it started spluttering add the red chili and curry leaves.
    • Add the curd pavakkaya mix into the seasoning.Just heat for 30  seconds.Add salt as required
    The delicious Pavakkaya Kichadi is ready to serve..
    Cook’s Tip
    • Do not cut the pavakkaya into very thick,then it will take more oil and more time to get it fried.
    • Do not over heat the curd bittergourd mix.

    Wednesday, July 21, 2010

    Vellarikka Pachadi-Cucumber in Coconut-Curd mix

    The cucumber has a very important  role in Kerala cooking.. There are different kinds of cucumber(visit here for more details). Mainly there are two  types of  cucumbers: one is Kerala cucumber (yellow cucumber/dosakkai) and garden Cucumebr(we call it as salad cucumber-used for the raitha and salad preparation. good for eyes also).In Kerala cooking we use the former one. I always like to make the Pachadi with this vegetable. Actaually, the  Pachadi is a dish with curd, cocunut, jeera(cumin seed) and Kaduku(mustard seed). When Amma prepare this pachadi she does not add mustard. My brother and I doesn’t like the taste of mustard so she always prefer to make it  with no mustard.. but my hus home,  they used to add the mustard seeds Nowadays I used to prepare my mom’s and mil’s recipes... and we are calling both the dish as pachadi..(at first we have some confusion abt the name ) Today i am going to share with u guys my amma’s Pachadi recipe. I already added my mil’s recipe-Pineapple Pachadi.You can use fruit and veggies for the preparation. It is one of the important dish served for Kerala sadhya.(feast) .Anyway within weeks we all are going to celebrate our Onam festival .So do not miss to include this delicious pachadi in ur list..
    Ok let me share the recipe.
    Ingredients
    Yellow Cucumber:1/4 portion
    Green Chili: 3 nos
    Salt: to taste
    Curd: 1/2 cup
    For Grinding
    Coconut: 1/4 cup
    Cumin seeds: 1 tsp
    Pearl onion: 1 no
    For seasoning
    Oil: 1 tsp
    Mustard Seed: 1 tsp
    Red Chili: 1 no
    Curry leaves: 1 sprig
    Preparation
    • Peel the skin and de seed the cuumber then cut them into very small square pieces.
    • Chop the green chili
    • Make a nice paste of coconut,Cumin seeds and pearl onion.Add some water for grinding.
    Procedure
    Step1:
    • Cook the cucumber pieces with chopped green chili, salt and 1/4 cup of water for 3 minutes in medium heat.
    • Add the coconut paste to the half cooked cucumber and let the mix to cook for 5 minutes or until the cucumber pieces are completely cooked
    Step2: 
    • Let the cooked mix to cool down.Add the curd  and mix well..
    Step3: 
    • Heat oil in a pan .Add the mustard seed, Once it staretd spluttering add the red chili and curry leaves.. 
    • Add the cucumber-curd mix into the seasoning. change the heat level to very low and just heat it for 2 minutes...Do not boil the mix.
    The Delicious Vellarikka Pachadi is ready to serve.Have it with rice.
    Cook’s Tip:
    • Do not add more water for cooking the cucumber 
    • Do not add curd to the hot mixture
    • Do not over heat the pachadi while seasoning.
    • According to your taste add more chilies.
    • Do not add more pearl onion.

    Saturday, July 17, 2010

    Aloo Methi Masala and Beetroot Chapati

    Today’s special is  Aloo Methi masala (Potato-Fenugreek leaves Masala) and Beetroot Chapati. Usually for dinner, i always prefer to prepare the kerala style meal, Rice with some veg or non veg sides. Because that's the only time my hus can  really enjoy the  food. During the breakfast time he will be so hurry to leave to work and lunch time he will be in office. So dinner and weekend meals should be our favorite. that's the reason i always add some specials on these meals like fish fry chicken curry etc..But nowadays my little one is making me so busy. sometimes i couldn’t even find time for cooking. Always he  needs his mom to play with him. So today,  i thought i can prepare some simple but delicious meal for the dinner. After a minute thought, i  decided to make the potato curry and Chapathi. Like to make some variation to both dishes. I usually buy frozen methi leaves form Indian grocery. so thought of combining the healthy leaf with the potato..the dish became Aloo methi in my own style....And  for a variety, I made the beet-root chapathi.Very easy and within a short time span i made both the dish.
    OK lets talk about the recipes..starting with Alloo Methi Masala
    Aloo Methi Masala
    Ingredients
    Potato: 4 nos
    MethiLeaves:: 1/2 cup(i used frozen)
    Onion: 1 medium
    Tomato: 1 small
    Green Chili: 1 no
    Garlic: 2 pods
    Ginger : 1 medium
    Turmeric Powder: 1/2 tsp
    Garam Masala: 1 tsp
    Coriander Powder: 1 tbsp
    Chili Powder: 1 tsp
    Kasoori methi: 1/2  tsp
    For seasoning
    Oil: 1 tsp
    Mustard seed:1/2 tsp
    Cumin seed: 1/2 tsp(optional)
    Red Chili: 1 no
    Curry leaves: 1 sprig 
    Preparation:
    • Slice the onion into very thin pieces.Crush the ginger and garlic Chop the green chili.Cut the tomato into 8 pieces.
    • In a pressure cooker add enough water and boil the potatoes until 2 whistle.. Let it cool and peel the potatoes .Dice them into medium sized or mash them ..Keep it aside
    • Defrost the methi leaves.. (just keep  outside for 30 minutes then it will be ready to cook).
    Procedure
    Step1: 
    • Heat oil in a pan.Add the mustard seed once it started spluttering add the red chili and some curry leaves.Saute for some time .
    • Add the ggg’s followed by the red onion.. saute until the onion are  transparent.
    • Add the tomato pieces and saute for 1 minute..
    • Add the Turmeric,Chili,coriander,garam masala and kasoori methi powder and mix with the sautéed ingredients.
    Step2:
    • Add the methi leaves and mix all together.. saute well
    • Finally add the mashed potatoes.close the pan and let the mix to cook for 3-5 minutes in medium heat.. 
    • Garnish with some curry leaves.
    The delicious Potato Methi masala is ready to have Have it with chapati.. 
    Cook’s Tip
    • Here i used the frozen methi.If u use the fresh one just saute/cook for some more time.
    • If u don’t like to mash the potato just cook them accordingly.. Here i mashed the potatoes.Both ways it tastes delicious
    • According to ur taste bud change the quantity of chili powder.
    Beetroot Chapathi
    Ingredients
    Beetroot: 1/2 portion of a medium sized beet
    Wheat flour: 1 cup
    Oil : some
    salt : to taste
    Ghee/Butter: enough
    Water: enough
    Preparation
    • Dice the beet and cook them in the microwave for about 5 minutes Add some water and salt..
    • Make a paste of the cooked beet.
    • In a large sized bowl mix the wheat flour, salt, beet  paste and oil together.
    • Add enough water and mix it and make a dough with right consistency for the chapati
    • Cover the prepared dough with a wet cloth and keep it aside for 30 minutes to 1 hour
    Procedure
    • Make medium lemon size balls from the prepared dough
    • In a flat surface or flat wooden chapati maker roll them into circular shape.Add the flour while rolling it for not sticking to the surface
    • Heat the pan ...Place the rolled dough and just heat up both side (30 sec - 1 min)
    • Meantime place the chapati grill(see the picture) on the stove top and  heat that and place the half-cooked chapati on it and cook. It will make the chapati so softer and tastier.
    • Apply butter/Ghee to the cooked chapathi.. It will give nice flavor..
    The Delicious beet chapathi is ready to have..Have it with Aloomethi masala
    Cook’s Tip
    • Do not add more water to cook the beet-root.. if excess water is there just use that for mixing the flour ..
    • If u like  u can increase the quantity of the beet.
    • Instead of mixing all the ingredients together you can  do it separately.First mix and  make a dough then add the beet paste and mix together 
    sending the aloo methi to  Think Spice-Think Fenugreek guest hosted by Priya, event by Sunita..

      Monday, July 12, 2010

      Chicken Liver Masala

      “Viva España” ..Hope every body had enjoyed the 2010 FIFA World Cup Soccer Final. At last, Spain got the cup.. The final match was not too bad though it was a physical game (especially Netherlands's play)..It was a war in the play-ground.The Red Bull vs Orange Lion. This was the first time Spain got the chance to play in the World cup final and they got it...Good work guys.
      My hus is a die-hard fan of this soccer. He used to watch all the game; for a company me too. After watching few games I also got interested in these games...I never forget the Ghana vs Uruguay match..After watching the game I was so disappointed. The penalty kick he (Gyan) took in that last minutes in the extra time was not gone through but the within minutes he scored the goal in the penalty shoot-out!.. If he could make the same few minutes ago,  those guys sure would have won the game..I always scared of watching the penalty shoot-outs.. The entire team’s future is depend on one single player, he fails to score, the entire team loses. That's bad right? Winners, you keep up your work. Losers, failure is the step for the victory, so don’t worry Keep going. We will see you all again in Barzil after 4 years.
      OK, Let me share my worldcup special recipe. It is a chicken dish.but very special kind of dish.-Chicken Liver Masala.Chicken is familiar to everyone and and it’s one of the favorite meat for all non-vegetarians. However, I am pretty sure that so many of u haven’t tried this chicken liver masala. I haven’t tried either until last week. I was not that familiar this liver curry but tasted the lever pieces often when mom used to make the chicken curry at home. She always add  the liver pieces in the chicken curry  for me as because it is my favorite one. If my brother found the piece in his curry plate, he used to say:”hey ur special is in my plate”. However I hadn’t tasted the specially made liver dishes like “Chicken Liver masala”. When we came to US,  we used to buy the Mutton liver from HALAL market but not chicken liver. We never thought about Chicken Liver. Recently I saw this chicken liver in our favorite grocery shop: Kroger.
      Today  when I started preparing tea in the morning  I realized that we didn’t have the milk.Somehow I forgot to buy it .So we decided to goto our favorite shop:Kroger.We bought the milk and i thought i can make some chicken biriyani,ya really anyway its weekend.. just told my hus and just headed to poultry section.There i saw something unusal, one box (looks like yogurt box) little confused  “why did they place this yogurt in meat section”.. Then i checked the label and realized that it was not yogurt ;it was chicken liver. I was so excited.because very first time i was seeing such an item there. changed the plan for the biryani and  bought one liver box.  Then made this soccer special liver masala.
      About the recipe,this is so simple and the process is as same as the way we used to make the chicken curry. one difference is that here we are not using the tomato.One more thing this time i used the home-made masala for this preparation. .Amma used to prepare the same at home but, whenever i asked her about the quantity she use to say “athu oru alavinangu edukkanam”. She never gives the exact measurement because she never follows the measurements, just use her intuition and experience. However, this time I could successfully convert her intuition and experiences in to exact measurements and it  came out really nice.. The homemade masala taste really superb fresh and so aromatic.so does the curry :).If u are a liver lover and if u have a chance to buy it,  don’t miss to try this delicious liver masala. It is so simple and a superb combination with chapathi, roti, paratha and tosted bread.One more thing i want to say: Keep it for sometime before serving then the liver pieces get the masala and it tastes really good. Ok let me  explain the details of our favorite chicken liver masala recipe
      Cost of the Item:3.50 usd/1.1 Pound
      Ingredients
      Chicken liver: 1 pound
      Butter: 1 tbsp
      Red Onion: 1 medium sized
      Ginger: small size
      Garlic: 3 pods
      Green Chili: 2 no
      Turmeric Powder:1/2 tsp
      Red Chili Powder: 2 tbsp
      Coriander Powder: 2 tbsp
      Garam Masala: 1 tbsp
      For Seasoning
      Oil: 1 tsp
      Mustard seed: 1 tsp
      Red Chili: 2 nos
      Curry leaves: 1 sprig
      Preparation
      Step1:
      • Cut  the liver pieces into small size and wash them under running water.
      • Marinate the Liver pieces with some salt ,Turmeric powder and chili powder.
      • Slice the onion into small pieces.Crush the ginger and garlic.Slit the green chilies.
      • Prepare the Garam Masala as follows:
                   Fennel seed:1 tbsp
                   Cardamom:8
                   Cinnamon stick: 1/2 portion of a stick
                   Star Anise:1 no
                   Nut mug: 1/2 of a cardamom size
                   Peppercorn: 8 nos
                  clove:7-8 nos
           Fry all the  ingredients  and make a nice powder.Keep the rest in an airtight container.
      Step2: 
      • Heat 1 tbsp of butter in a pan.Add the mustard seeds,once it started spluttering add the red chili and curry leaves .. saute for 30 seconds.
      • Add the GGG’s.saute for sometime
      • Add the Onion slices into it. saute until the onions get transparent.
      • Add the  turmeric powder,Chili powder Coriander powder and Garam Masala.Mix well with the onion mix
      • Add the Liver pieces into the masla mix and cook the same for 7-10 minute in medium heat.Garnish with curry leaves.
      The Delicious Chicken Liver Masala is ready to have.Best combination is with chapathi.


      Cook’s Tip
      • Do not overcook the liver .If u do so, it will become  rubbery  and won’t get the real taste and texture.
      • You can use oil instead of butter. I prefer Coconut oil.It will give nice taste and aroma (Keralites like its taste and aroma).

      Tuesday, July 6, 2010

      Lunch/Dinner Platter and Okra in Coconut Milk curry

      I thought of posting a Kerala style lunch/dinner platter for long time. But I always forgot to take the pictures and also it is not quite easy to set all the curries for the photos. However, this time I did it and today I am going to share with you guys the delicious platter. Everywhere platter has its own traditional way of side dishes and the main dish. In Kerala style platter, we usually have rice for our lunch and dinner: Rice with one curry, one thoran (stri-fry), one mezhukkupiratti (fried vegetable) and a non-veg dish..then papad or pickle; sometimes both.Today's Platter has 3 side-dishes, the sides are "Okra curry", "Shrimp fry" and "Koorka mizukkupiratti". This a best combination platter. I already posted the recipes for Shrimp Fry and Kooka mizhukupiratti and I thought of sharing the recipe for okra curry today. Okra is my favorite veggie. So love to have any dish with this delicious veggie. Actually my hus doesn't like its texture. So whenever I prepare any dish with this vegetable, I saute it nicely and then only use it in the dish otherwise it will have the mushy(gummy) texture. He likes this curry because it doesn't have such a gummy texture. Nowadays this is a common in our menu. Hope u guys also try this curry.. It is not so difficult (the only difficult part is the prepartion of coconut milk. if u r using the canned milk then nothing to worry  ..very simple one) Within minutes u can prepare it as a side dish for ur rice, roti or paratha (even with bread).  taste really delicious.. so try it.
      OK let me explain the platter in detail
      Main Dish: Rice
      Here i used the Parboiled rice..This is a type of rice almost similar to our kuthari rice ( in shape) and also taste good and healthy.
      Side Dish1: Koorkka Mezhukkupiratti/Chinese Potato Stir Fry
      Check here for the recipe
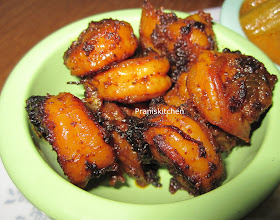
      Side Dish 2:Shrimp Fry/Chemmen Pollichathu
      Check here for the recipe
      Side Dish 3: Okra in Coconut Milk/vendakka curry
      Ingredients
      Okra:10 nos
      Onion: 1/4 portion of a medium size
      Green chili: 1 nos
      Tomato: 1 no
      tamarind: small quantity
      Coriander Powder: 1 tsp
      Chili powder: 1 tbsp
      Turmeric Powder: 1/2 tsp
      Diluted/Thin coconut milk: 11/2 cup
      concentrated/Thick coconut milk: 1/4 cup
      For seasoning
      Oil: 1 tsp
      Red chili: 1 nos
      Curry leaves: 1 sprig
      Preparation
      Step1:
      • Wash the okra and cut each of them into 3 pieces.
      • Cut the onion into very small piece .cut the tomato into 8 pieces.cut the green chili into small pieces.
      • Soak the tamarind into little hot water.
      • Prepare both the concendarated and diluted coconut milk.
      Step2:
      • Heat oil in a pan.Add the mustard seeds.Once it get started sputtering add the red chili and curry leaves.
      • Add the onion green chili ,saute for sometime
      • Add the Okra pieces then saute for 5-7 minute or until the okra get well sauted.
      • Add the tomatoe pieces into it saute well
      Step3: 
      • once the tomato get sauted add the salt, turmeric powder ,coriander powder and chili powder along with the tamarind juice and diluted coconut milk.boil the mix until the okra get cooked completely.
      Step4:
      • Finally add the thick coconut mix and mix well .. just  heat for 1 minute.
      The delicious okra curry is ready to have..Have it with rice and other sides.
      Cook's Tip
      • Dry the okra using the kitchen tissues before cutting them into small pieces
      • For making the diluted coconut milk just add some quantity of water.
      • If u like u can smash the cooked okra pieces .
      • Do not add more tamarind juice. If u added the more tamarind, just add more concendrated coconut milk at the last step (to balance the taste).
      Pappad pickle and curd are always a side for the rice.Hope all of you have enjoyed this delicious platter.

      Thursday, July 1, 2010

      Mulakeshya/Mulaku Puli/Green Chili Pickle

      Today's special is a kerala special dish. It is a kind of pickle: MulakuPuli (Mulakeshyam - Green Chili Pickle). The name itselt saying the main ingredient of this dish : "Mulaku" is the malayalam word of Green Chili. I don't know how many of you are familiar with this recipe. This is a kerala special dish famous  in Palakkad. 
      Another thing is that the main ingredient of this recipe (Green Chillis) used for this preparation are from our own kitchen garden.Do not get confused.We have a small vegetable garden at out balcony.We both like gardening. Our small vegetable garden have Tomato, okra and this chili. When the first chili pepper beginning to grow my hus  started saying that we can prepare the mulakeshyam with this chili.. Frankly speaking, i only heard about the dish but never get a chance to taste the same. I was pretty sure that amma didn't prepare that dish ever. But MIL's side, they prepare it often. Once I was taking to my MIL i just told her about our chili plant and my plan to make the mulakeshya. So she gave me this recipe (also I got the same from my SIL's mom). So my special thanks to my mil and valsala aunty.. When i started preparing this dish i was not sure that it will be so good. But luckliy it came out really good why i was saying this because i got a wonderful comment from my Hus saying that  it's taste same as amma used to prepare at home.what else  i need more than that.. Really i am so happy  because i got a chance to fulfill my hus desire to eat the delicious mulakeshya with our own home grown chili peppers.  another thing is  that i got one more pickle recipe. 
      Usually we use the less spicy chili for this preparation. The chillies here  i used was so spicy so for avoiding the hot what i did is,just removed the seeds and veins of the chillis.. If its too spicy we can't get the exact taste. when i was talking about the spiciness, my mil told just pick them before getting matured that way can avoid the spiciness.thats was a new info for me.So yesterday i got the new batch of chilies i picked the young ones, Yes, she was right, it was not as spicy as the previous batch..
      About this recipe.Its almost similar to the Puli inji (Ginger Pickle) . but the cooking method is not as hard as the puli inji.the best part is you can keep it for about 2 week in the refrigerator. a very best combination with rice and if u r pickle lover just have it with any dishes (roti, chappathi etc).As i told do not use the very hot chilies.OK lets tell u the recipe in detail.. do not forget to give a try.
      Ingredients
      Chili: 3 nos
      Salt: to taste
      Water: enough
      Tamarind:a lemon size
      Asafoetida: 1/2 tsp
      Coriander Powder: 11/2 tsp
      Fenugreek powder: 1/2 tsp
      Kashmiri chili powder/Chili powder:1 tsp/1/2 tsp
      jaggery: a small piece
      For seasoning
      Oil: 1 tsp
      Mustard seed: 1 tsp
      Red Chili: 1
      Curry leaves: 1 sprig
      Preparation


      Step1:
      • In 1 cup of water add 1-2 tbsp salt.(Check the salt level and if u need  add more salt) .Boil the water for 5-7 minutes in medium heat.
      • Let the salt water to cool down completely
      • Slit the chiles and remove the seeds and the internal parts(if its too hot).Cut the chilies into 4-6 pieces
      • Add the chili pieces into the salt water and keep it for about 1-2 hour
      • Soak the tamarind into 1/2 cup of water.
      Step2:
      • Cut the soaked chiles into medium sized pieces
      • In a 1/2 cup of water add the chili coriander turmeric fenugreek asafoetida powder and salt,mix well.
      Step3:
      • Heat oil in a pan.Add the mustard seed,once it started spluttering add the red chili and the curry leaves
      • Add the powdered water and stir for 30 seconds.
      • Add the tamarind water into it.let it boil for 2 minutes
      • Add the chili pieces into it.
      • Cook the chiles for 10-15 minutes  in medium heat or until all the water dry out.
      • At last add the jaggery. The mulakeshya should be in a thick gravied frm.
      The delicious pickle is ready to serve.
      Have it with any of ur favorite dish.The rest sholuld be transfered to the air-tight container and keep refrigerated for 2 weeks(if u prepared that much quantity )
      Cook's Tip
      • Use less hot chilies.If u have only the hot chiles remove the seeds and veins  from the chile use the body part only.
      • Soak the chilies for minium of 30 minutes otherwise the chili doesn't get the salt .
      • If u don't like the sweetness do not add the jaggery.
      • By chance if u added more tamarind add this jaggery it will balance the excess tangy taste from the puli.
      • Do not add more water for cooking the chilies..
      • According to ur taste add more/less chili powder.